Friday, December 12, 2014

Vroom Vroom


She looks okay - right?

I am done with it.. I don't like the colors, but, watcha gonna do? 

So, I freaked a few items and finished the rest. 

First, I added lights to the back:

I did change the hood of the car...I think it looks a bit better now.

I added a back window and a blue brake light:

Of course, I added the backseat walls and windows:
Tomorrow we will begin on a garage for Cecil!!

Thursday, December 11, 2014

No Junk Fits in My Trunk


I am not happy with the colors of the trunk, but, it is shaping up quite nicely.
 
 
I have green fenders to match the front ones.  And I put a decorative matching piece on top. 
 

I then found smaller versions of the front hood (different colors - yuck!)


I affix them with a "two-by-six" plate. (And hide it with some smooth tiles).


There it is on the car!

I also added side windows and expanded the top... The green plates on top are just a place holder... not sure if they will stay or not.  The good news is that tomorrow is the last day for the car...I hope!!


Wednesday, December 10, 2014

Let me Get that Door for Ya!

I actually finished this thing last night, but, my favorite show had a special on, so I HAD to watch it.  However, I am home today, so I will post it now.

As you can see, we will be finishing up the front and putting some doors on.

I found these two pieces and thought they would make a great dashboard and glove compartment:

Am I right, or am I right?

They were flag type pieces, so I used two by one flat pieces with arms to secure them and secured those to the blue double sided pieces we used for the front in the last post to attach.

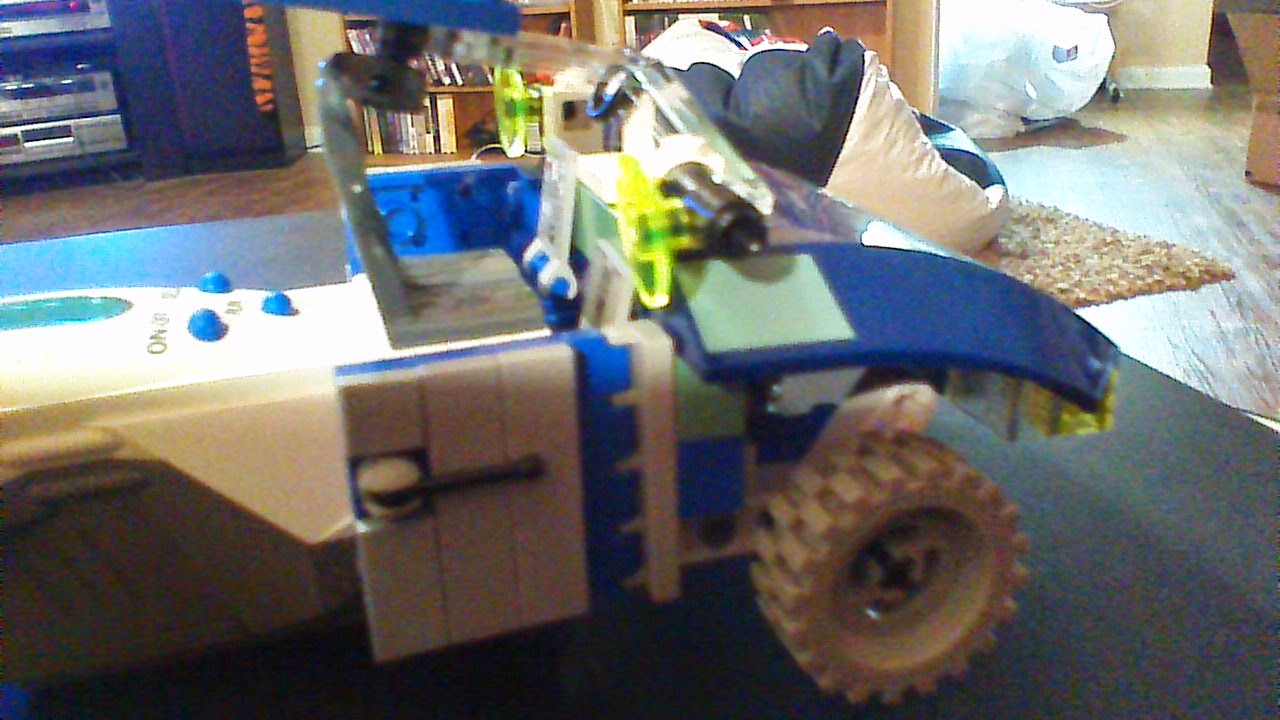
For the door, I used a hinge piece and add gray smooth pieces and an antennae looking piece for the door handle.

As you can see from above. These are secured using the same double sided bricks.

Check out what I found for the rearview mirror:

I am not sure what it was in a previous kit, but it looks like it will make and awesome rearview mirror.

I will use the piece next to it to attach to the top of the car.

I found these two clear pieces for the windshield. 

 
The problem is that I need another one...I vow to continue my quest for a third piece.  But, until then, let's hope it doesn't rain, and make sure our minifigs keep their mouths closed so that they do not eat bugs.  (Teehee)
 
I am using two of these dark blue pieces for the top of the car.  Here is the first with the windows attached:
 
 
Doesn't the mirror look great?


Here is what it looks like so far:


So, we will keep at it. I may post again tonight, if I have time...
 
Until then...


Monday, December 8, 2014

A Fender Bender


Let's start with the front of the car...

I have these awesome curved pieces that look like they could work for a fender.

These pieces will form the rest of the hood:


And, of course, you need lights! Duh!


I use the two side blue "one-by" brick pieces to start, so that I will be able to attach the side to the front:


Do you notice the high back seats?

I join the hood pieces together on the bottom and add lights:


Put it on the front of the "mind"


Then, I need to make sure to remember to put in a steering wheel:


I like these for side mirrors:


Here is how they look:


I put smooth pieces on the hood to finish it, but I suspect that they will come off when we add the window and hood...

I think we will do the back tomorrow!!

Until then.

Sunday, December 7, 2014

Ready, Set, GO!!


 We will be working on a minivan (or SUV) for a few days.  Since we have a robot mind from Lego Mindstorms, I decided to use it for the car.

So, today, I decided that I would begin with the wheels and movement and then we can work on the actual car for the next few days.

We  have two Mindstorms - the original and the Star Wars Droid Developer.  I decided to use the Star Wars one, since it was a bit smaller.


Here is the front part that makes the wheels turn:


I put one of those metal star stick things in there:


I build a piece with the "one-by" bricks with the holes in the side and stick it through the brain.

I then add a gear to end (to make the wheels turn):

I add two of those whole bricks to the sides for the next step:


Another gear gets put into one of the star sticks and lines up, right-angle like, with the first gear.

I then use the wacky "L" shaped with holes pieces and the locking little pegs:


I then add these to the sides of my front.


I then add wheels to the front and back!


The back wheels are simple Lego wheels.

And... It runs!!!


Saturday, December 6, 2014

Here We Go Around and Round and Round


So, I have spent the day reorganizing my stash (I've kind of made a mess in building the house!)

I also wanted to see what pieces I have to make a shower... Sadly, I am at a loss..

So I decided to make a merry-go-round (like at a park)

Here are the parts I used:

This one actually spins!


I attach it to the circle piece - that will serve as the base for the merry-go-round.

And attach a base piece to it:

I add arms so that the kids can hang on:

Then I put a post in the middle to anchor it and, well, because, most merry-go-rounds have a middle piece.

The best thing is... it spins!

I wish I could give you a hint as to what we will do tomorrow, but I have no clue, but I am sure it will be awesome.

Until then!!

Tuesday, December 2, 2014

Time to do my hair!!


Our bathroom is almost complete!! YAY!!

Above is the sink.  And here is the bottom layer:


Here are the pieces that I used for the bottom front:

Here is my faucet:


I attach the pieces above so that they swing:


The back half of the cupboard part is just a grey plate with smooth white pieces:

Put them together and voila!

For the sink, I use these right angle pieces to make the back of the sink:

And surround the rest with "one-by" brick pieces:

I then add smooth pieces and the faucet (of course):


I use these right angle pieces to attach the two worlds together:


Put them on the bottom half:


And then attach the top:


Tadaaahh!!!


Fabulous!  Tomorrow we will work on the shower!!